How to create your first digital menu with a QR code, step by step
A practical guide, with real screenshots of Menuyo, to get your restaurant, café or bakery menu online in under an hour — with allergens, several languages and a QR code that never changes.
A good digital menu is more than a PDF behind a QR code. It reads well on a phone, shows allergens, speaks the language of whoever is at the table and can change in the middle of service without reprinting anything.
This guide walks you through your first menu, step by step, using real screenshots of Menuyo. You will need less than an hour — and you can do it within the 15-day free trial, with no card.
Before you start: what to have ready
Your list of dishes and drinks, with current prices.
The allergens in each dish (more on that in step 4).
Photos of your main dishes, if you have them. They are optional and can be added later.
Your logo, as a PNG or JPG.
Step 1: set up your venue profile
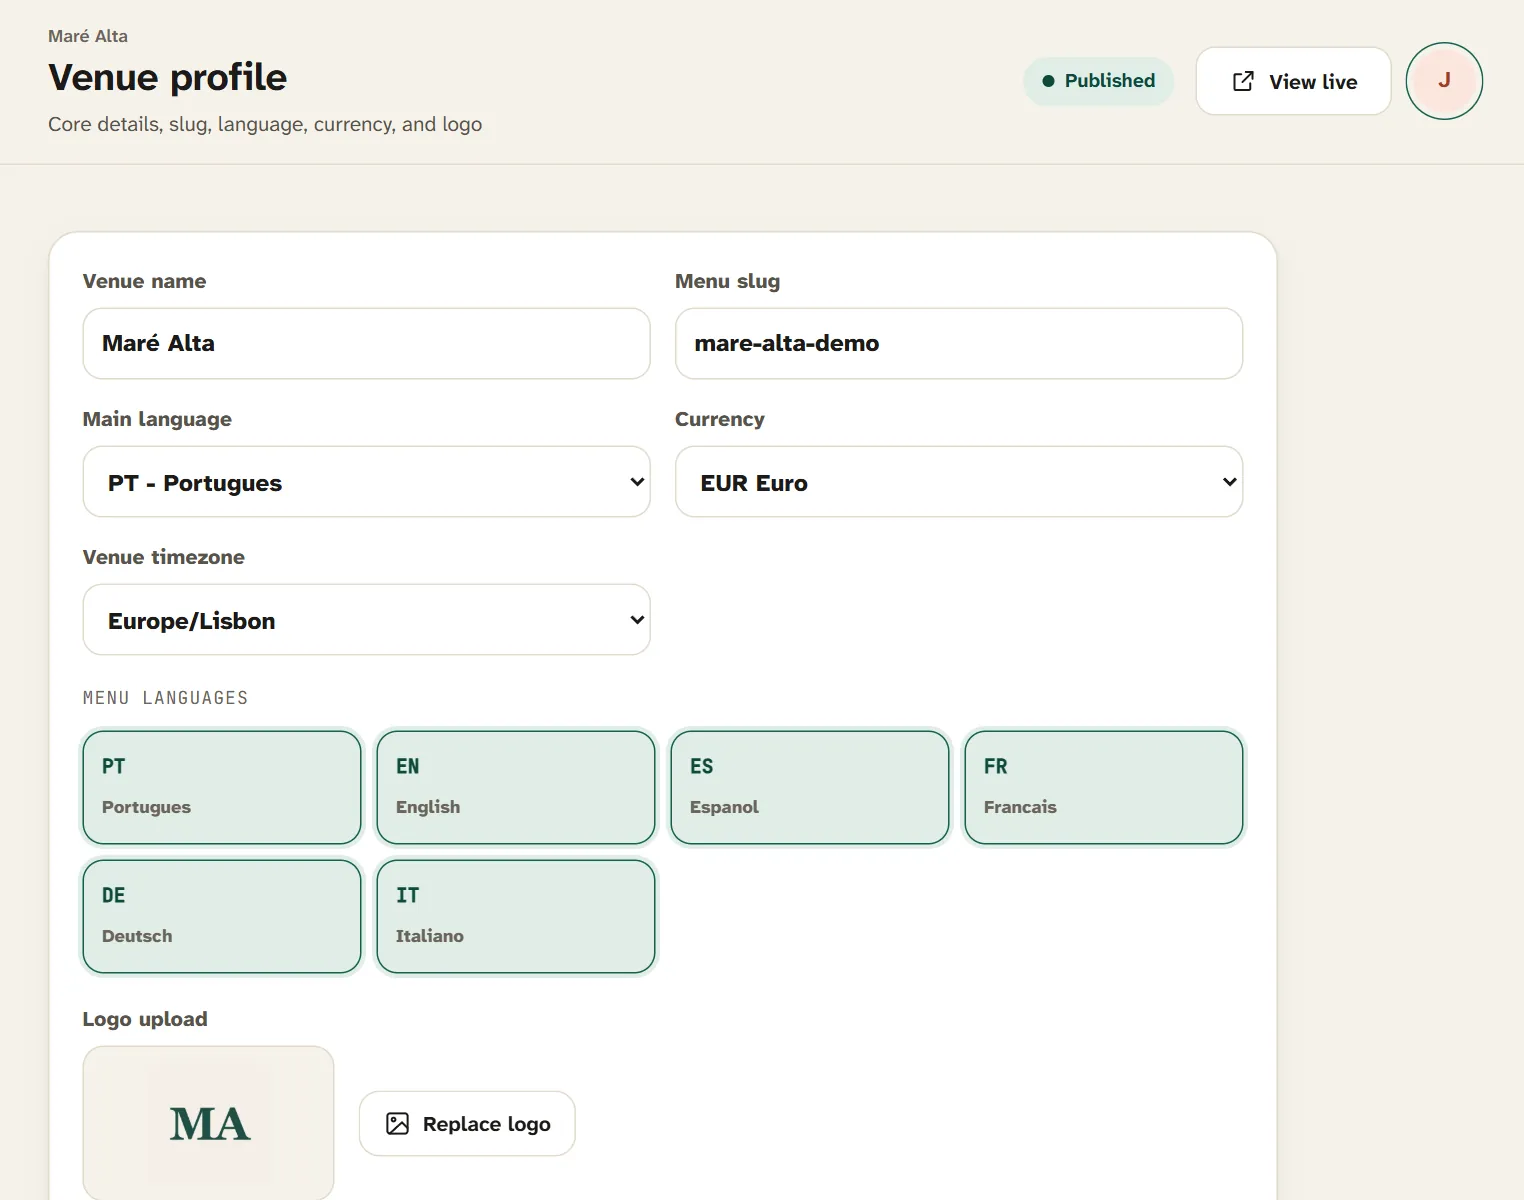
Once your account is created, start with the Venue profile. This is where you set the venue name, the menu's web address (the link your QR code opens), the main language, the languages you want to offer, currency, time zone and logo.
The venue profile: name, menu address, languages and logo.
Pick your guests' languages now. Menuyo shows the menu in Portuguese, English, Spanish, French, German and Italian, and guests switch language with a single tap.
Step 2: organise your categories
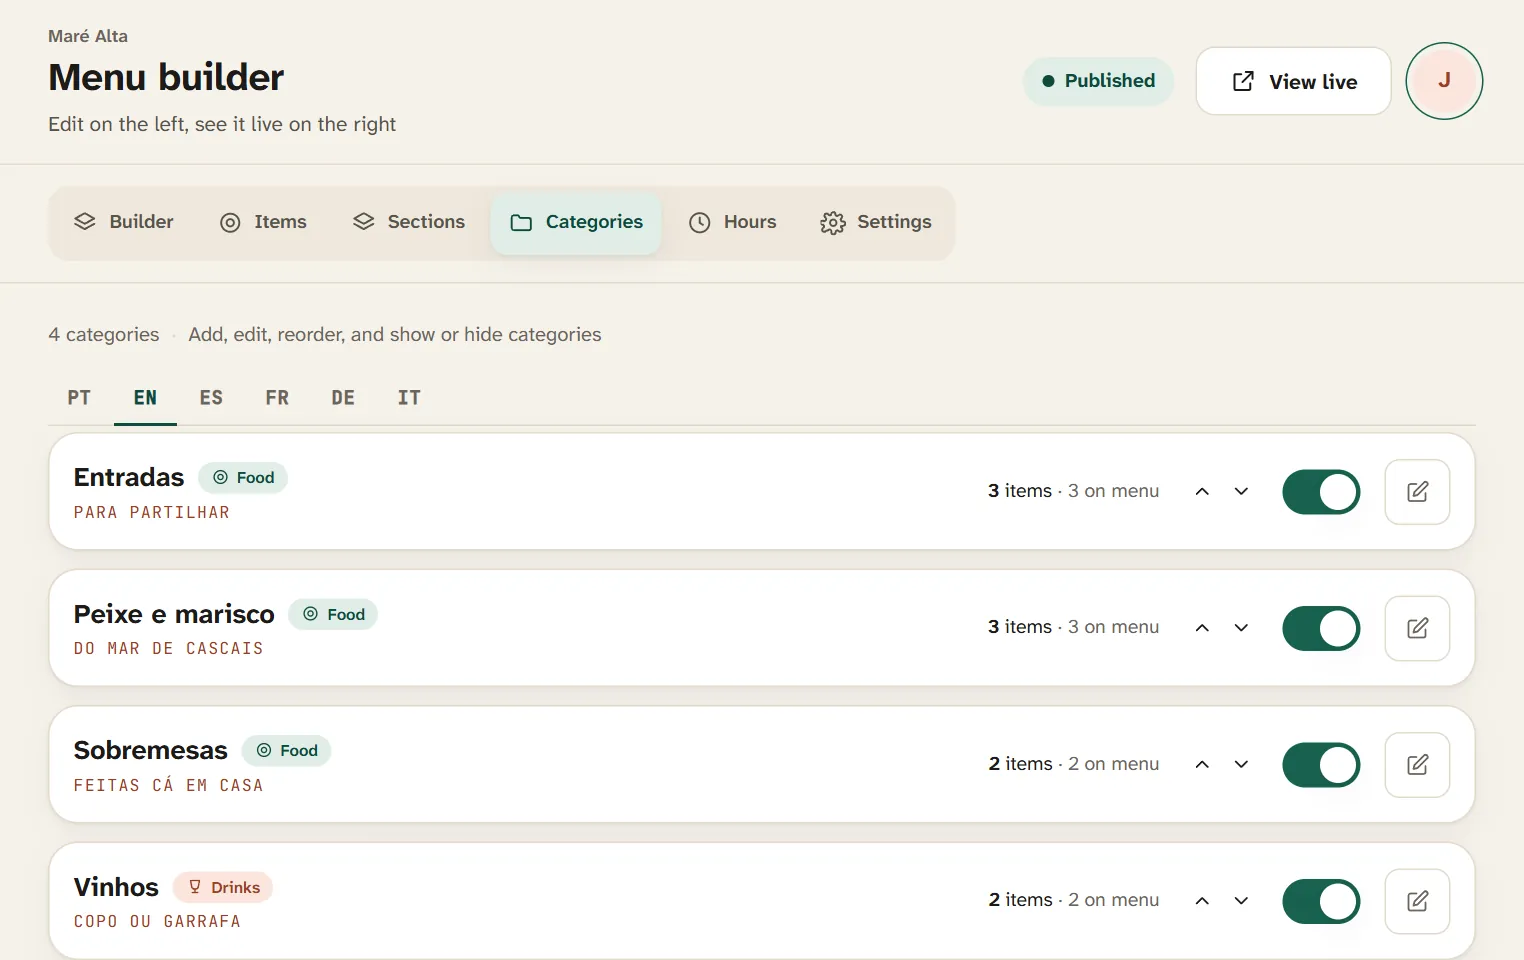
Categories are the sections guests scroll through: Starters, Fish & seafood, Desserts, Wines. Mark each one as food or drink, reorder them, and hide one for a while without deleting anything.
Categories: reorder, hide and mark them as food or drink.
If your menu is large — say lunch, dinner and a wine list — use Sections to group categories. Guests choose a section first, then see the dishes inside it.
Step 3: add dishes, prices and photos
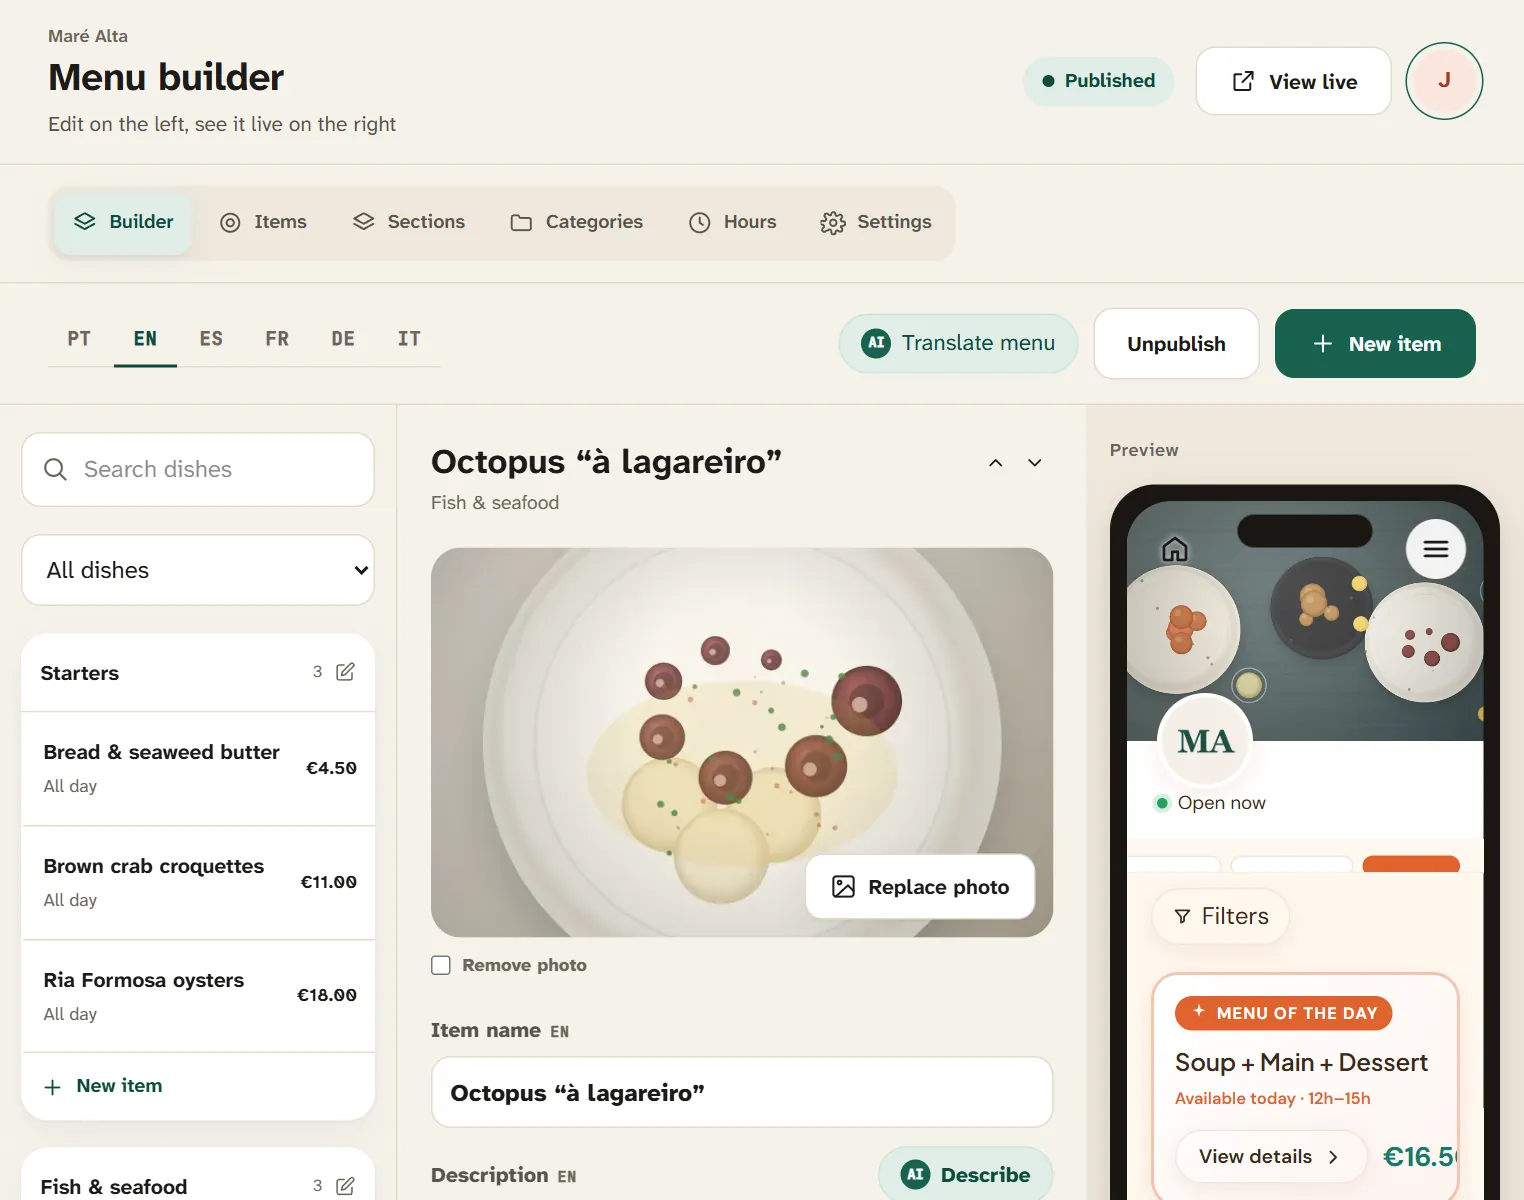
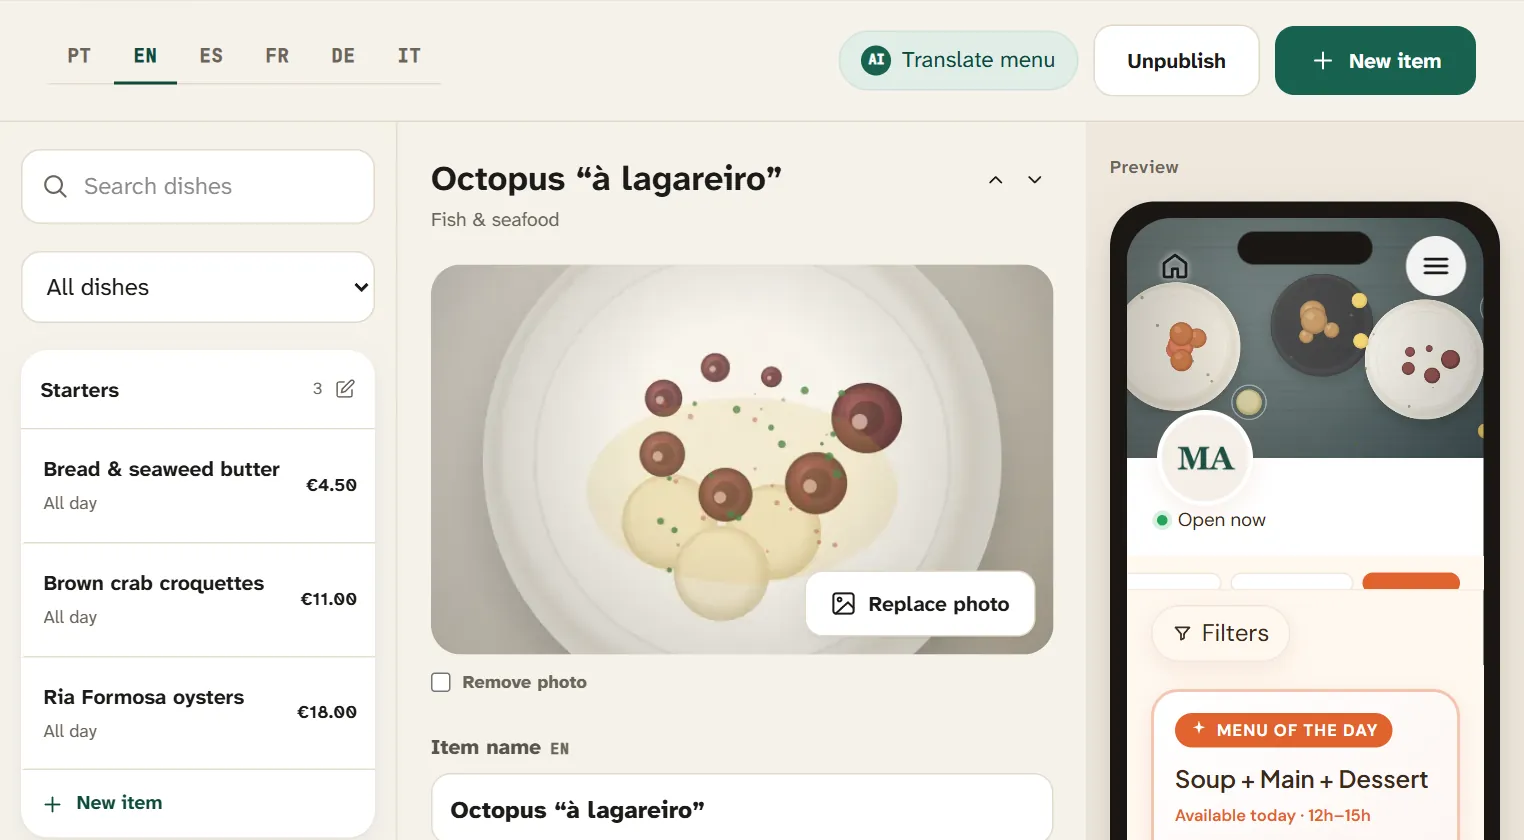
The Builder keeps everything in view: categories on the left, the dish editor in the middle and, on the right, an exact preview of what guests will see.
The builder: dish list, editor and live preview.
For each dish, fill in:
Name — short and clear. "Octopus à lagareiro" says more than "House speciality".
Description — one line with the ingredients that make it special.
Price — and more than one if you need it: glass and bottle, half and full portion.
Photo — optional, but a good photo helps guests decide.
Step 4: add the allergens
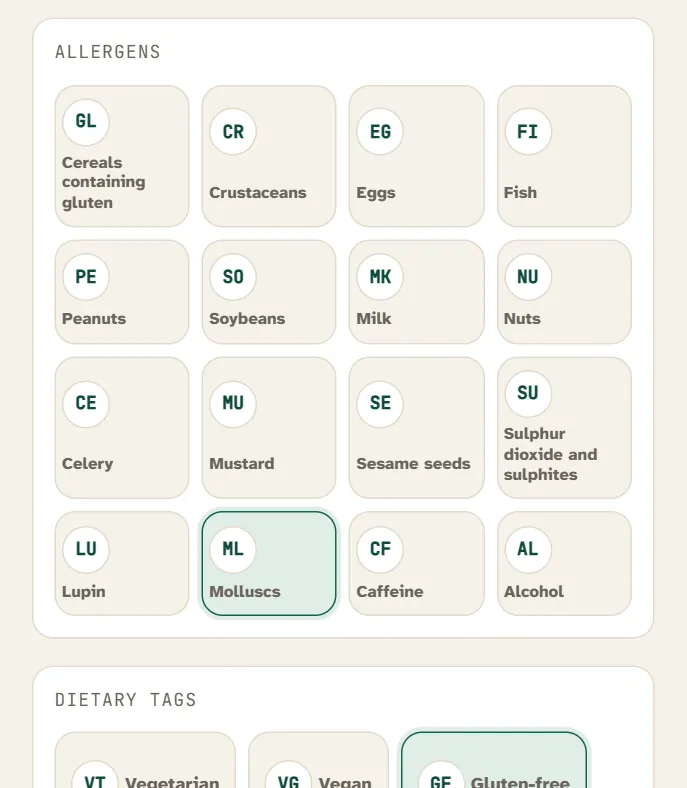
EU law requires you to tell guests about 14 allergens. In Menuyo you tick them on each dish, and you can add dietary tags such as vegetarian, vegan, gluten-free or spicy.
Allergens and dietary tags: one tap per dish.
Guests see the codes on the menu and the full list in the dish details. For what the law actually says, read our guide to the 14 allergens every menu must show.
Step 5: translate the menu
With the main language filled in, switch the language tab and write each dish's translation. The dots next to each language show what is already translated.
Language tabs: see at a glance what still needs translating.
On the Pro plan, AI prepares a draft translation of the whole menu, which you review and correct before publishing. We wrote a full guide on how to translate your menu for tourists.
Step 6: choose a design
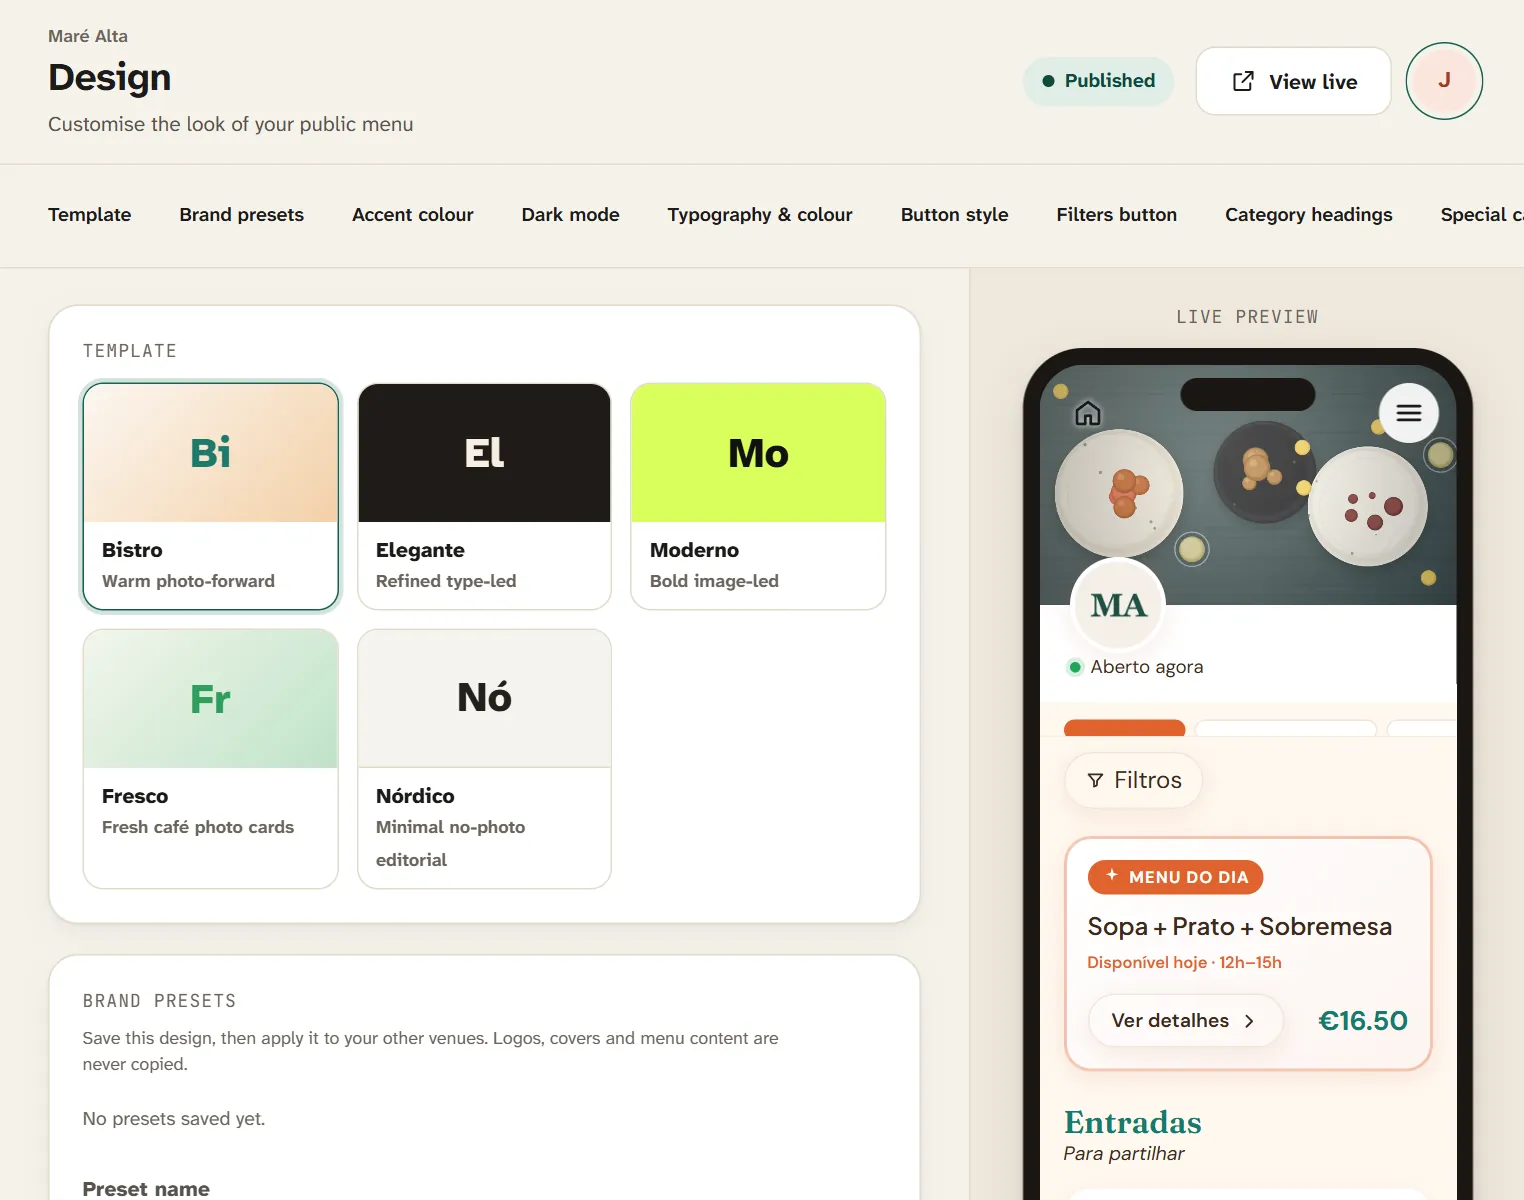
In Design, pick one of five templates — Bistro, Elegante, Moderno, Fresco or Nordic — and adjust colours, fonts, text sizes, buttons and your logo. You can also create a dark mode in your own colours. The preview updates as you go.
Five professional templates, adapted to your brand.
Step 7: publish and download your QR code
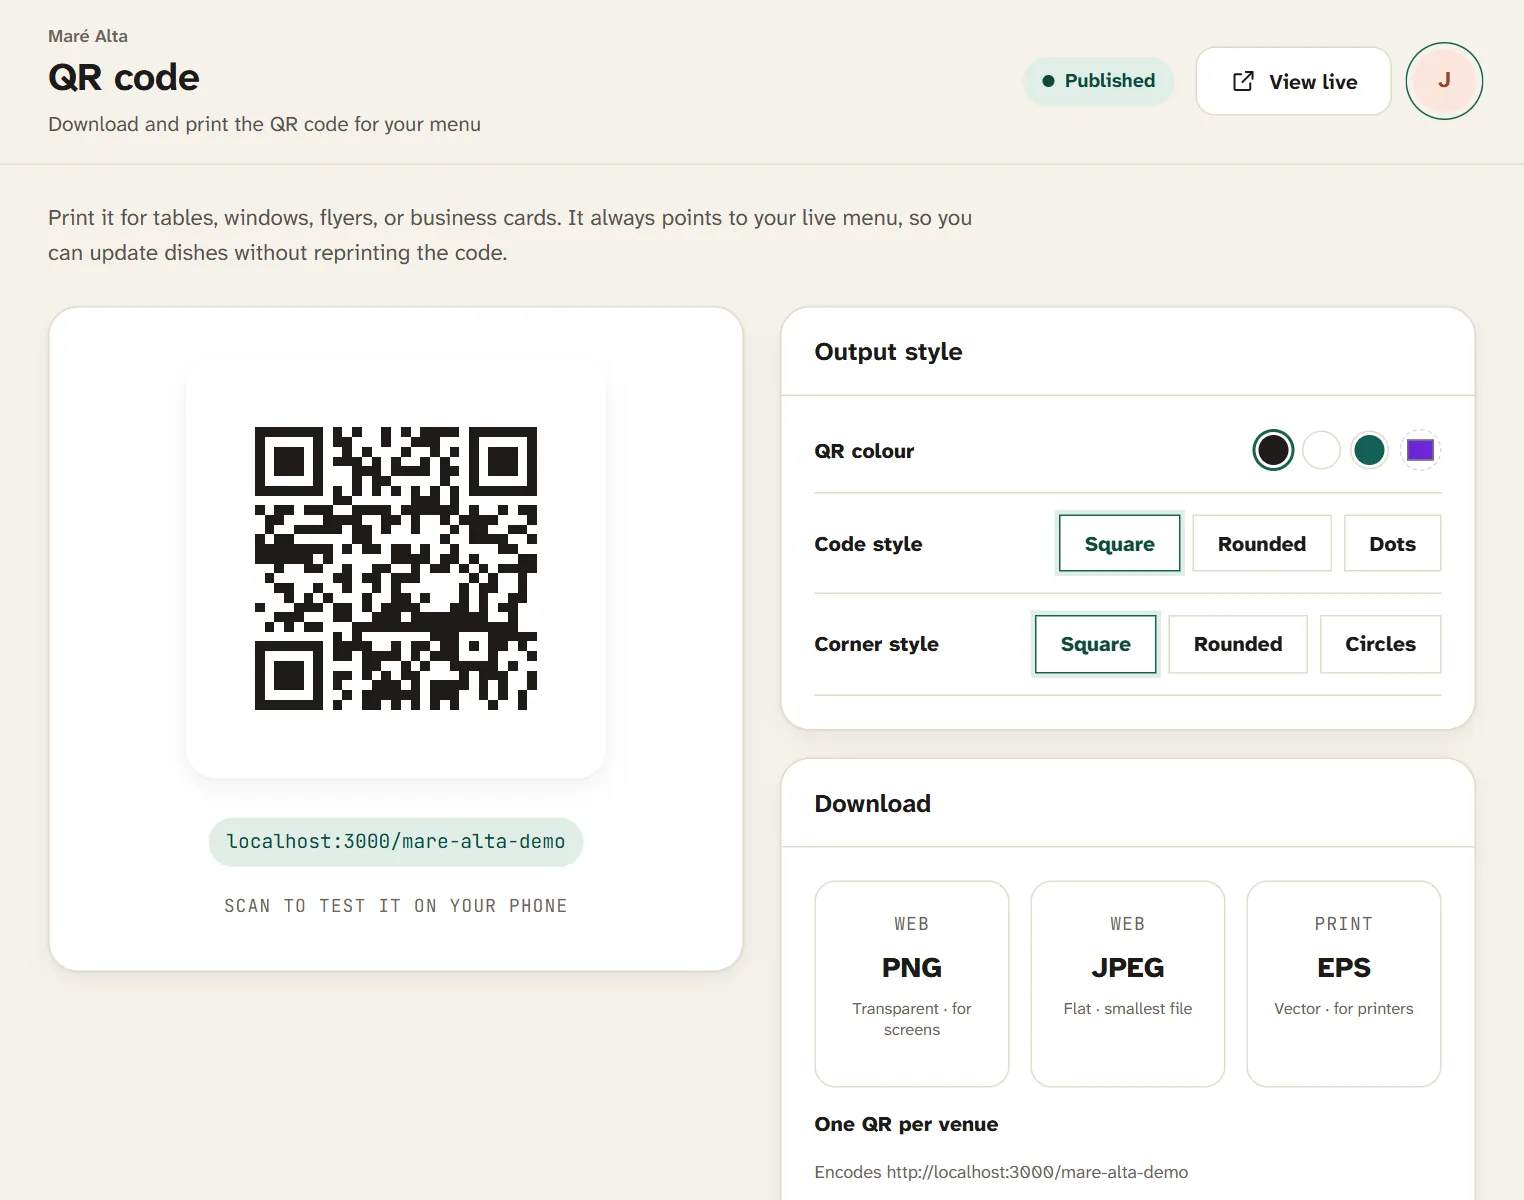
When you are happy, publish the menu. Under QR code, choose a colour and style and download it as PNG, JPEG or EPS — EPS is what your print shop will ask for.
One QR code per venue, as PNG, JPEG or EPS.
The QR code always points to the live menu. Change dishes, prices and photos as often as you like: the printed code stays the same.
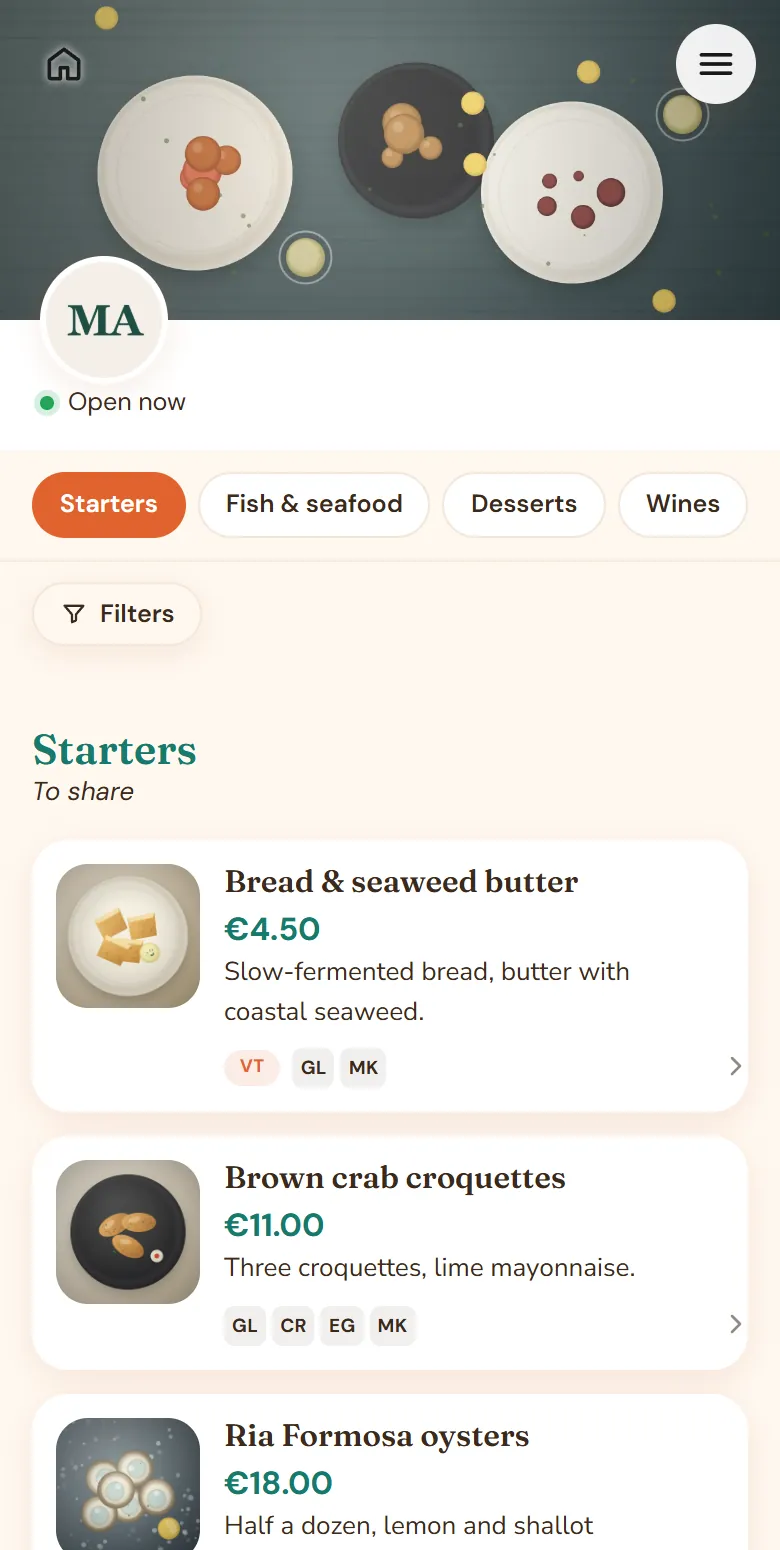
This is what your guests see on their phone:
The published menu as guests see it. No app to install.
Step 8 (optional): print a paper version
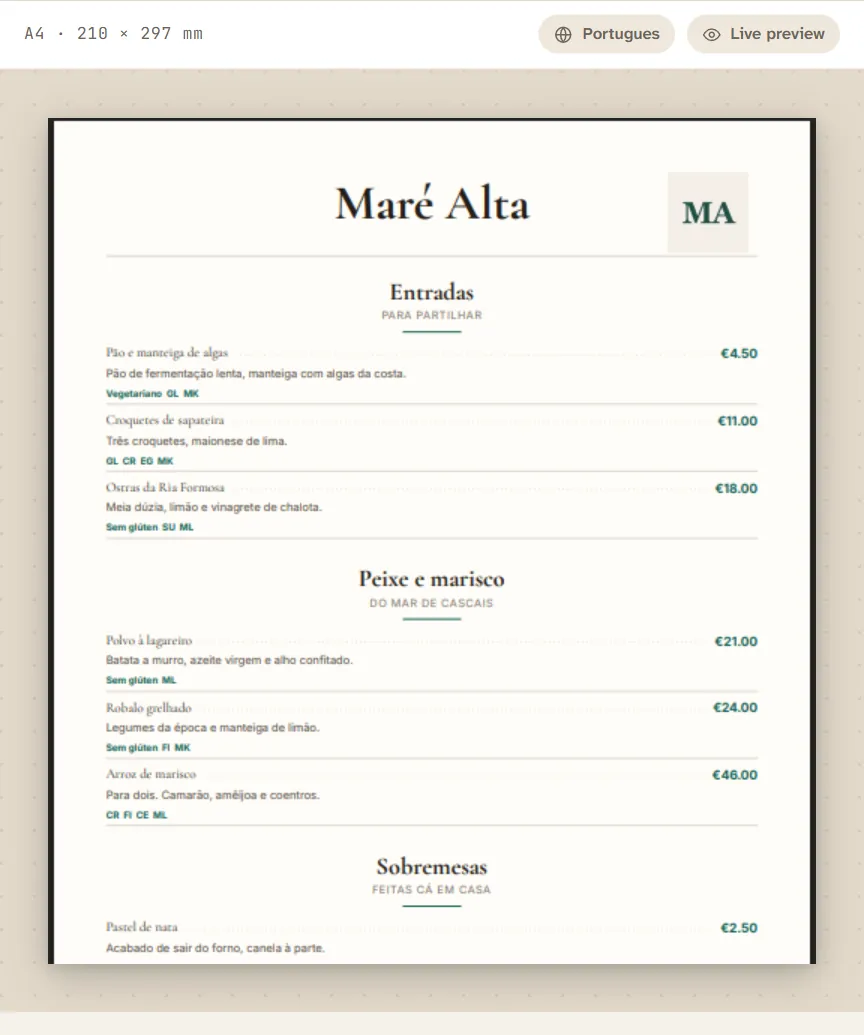
Some guests prefer paper, and windows and terraces often need a printed menu. In Print menu you create a print-ready PDF from the same menu: the full menu, a specials card, a compact one-pager or a takeaway sheet.
The printed menu comes from the same digital menu: change a price, print again.
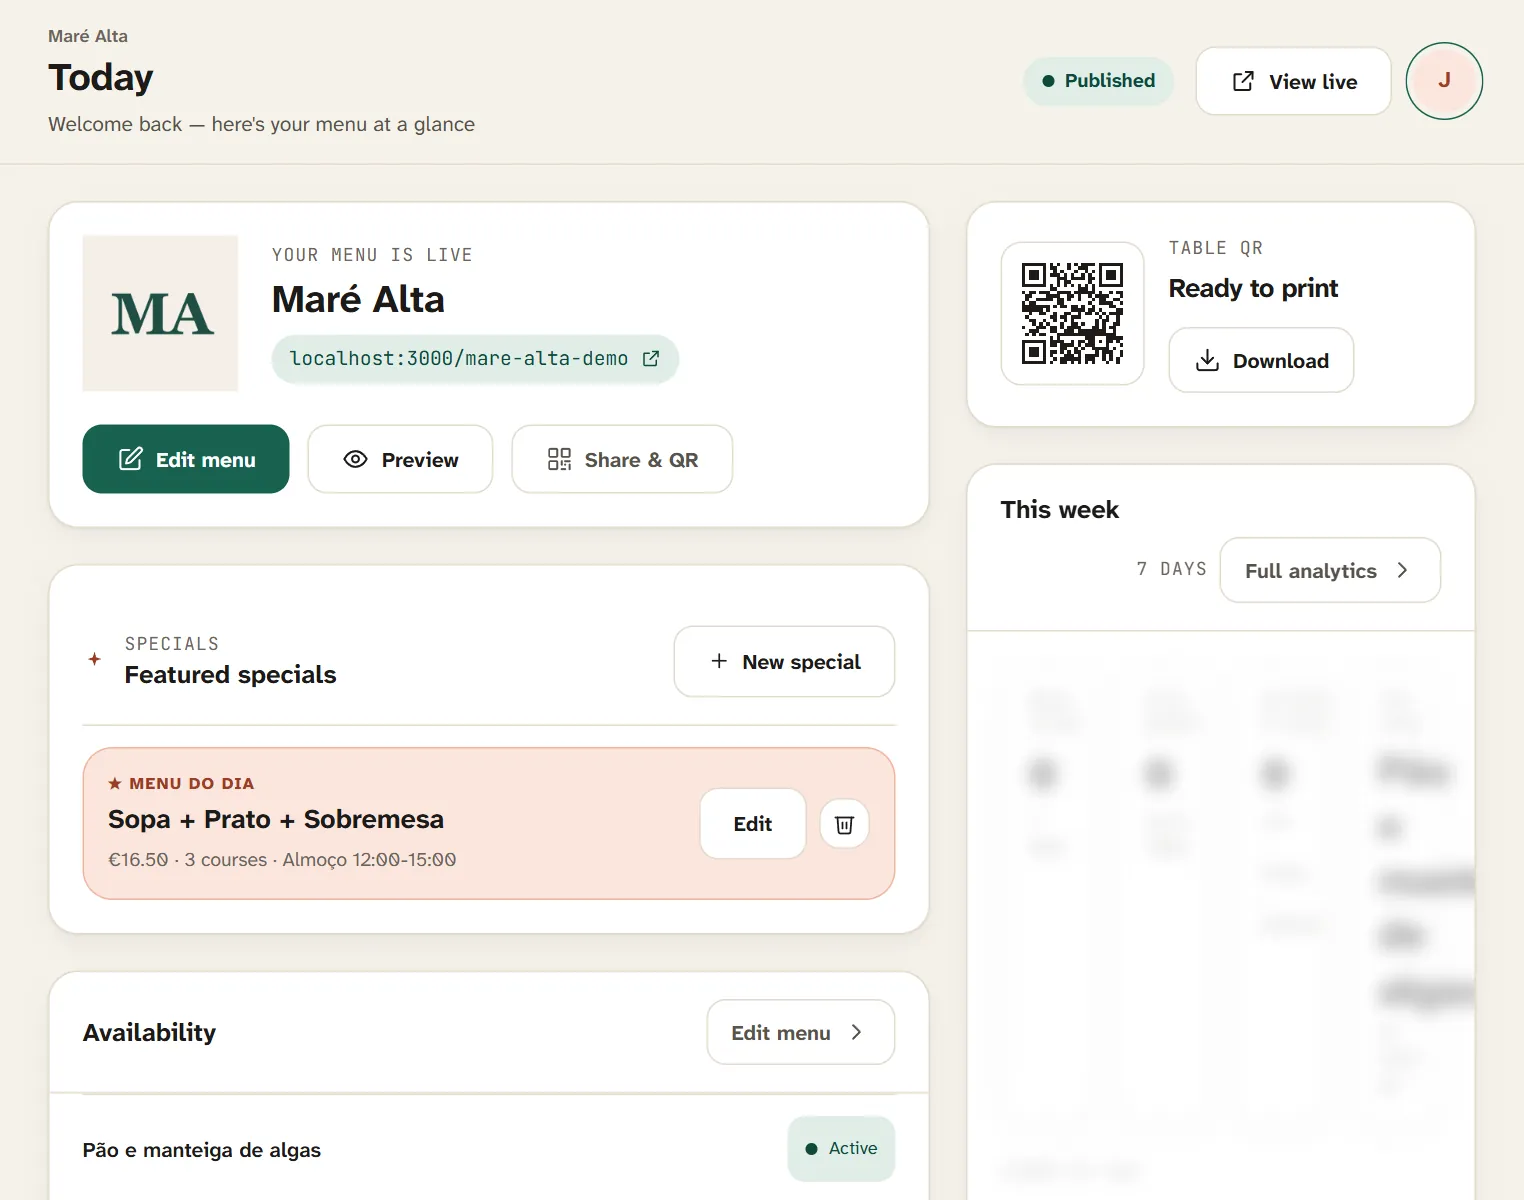
The Today screen is for everyday service. Sold out of something? Mark it sold out and guests see it straight away, with no new link. Running a menu of the day or a chef's suggestion? Create it under Special menu.
The Today screen: what you need during service, in one place.
The Pro plan adds analytics: how many people open your menu, your busiest hours, the most viewed dishes and the languages guests read in.
Frequently asked questions
Do guests need to install an app?
No. The QR code opens the menu in the phone's browser.
How much does it cost?
You can try every Starter feature for 15 days, with no card. After that, Starter is €14.99 a month and Pro is €21.99 a month (plus VAT). See all the details on Pricing.
Can I manage several venues?
Yes. Each venue has its own menu, design and QR code, all managed from one account.